Welcome to our ear guide page on ear crop care and posting. We hope these photos will help you feel confident in this process. Please remember that we have a huge investment in time and LOVE for your D & L puppy and we are always here to help you anytime of the day or night. We want this ear experience to be as positive as possible and we want your D & L puppy's ears to be as gorgeous as possible.
I want to take a minute to explain ear crops and posting. First, dog breeds with long heavy ears tend to have internal ear infections. So cropping the heavy ear and posting to lift ears up off of the head, actually has a health advantage for your dobie by decreasing these internal ear infections. Second, a great ear crop (that is posted correctly) is a sleek and elegant detail that completes the look of your dobie. Third, dobies are highly respected as a protector of their families. The cropped ear is a look that is consistent with that reputation. Cropped ears add to the "fear" factor of the dobie for the "bad guys". The cropped look is a signal to beware as you approach the house/kids because this is a Doberman and not a hound dog. But we also do respect any pet parent's decision for a natural ear crop. We prefer the look of cropped ears but have nothing against another person's desire for natural ears. Ear crops are a huge decision and should not be considered if there is any doubt of commitment by the family or any doubt on which look you prefer. We hope that none of our puppies go to a home that is not as committed as we were led to believe during the adoption process. This has happened on rare occasions and we were extremely hurt and disappointed in the families. We can guarantee that these families will never adopt another D&L Doberman as this lack of commitment causes us to fear commitment on their care in other ways as the dobie ages. We are always here to help our dobies and their families. There is absolutely no acceptable excuse for a failed ear crop on a D&L Doberman.
We at D&L, are fans of an awesome crop and a well posted dobie that finishes the look. But we had rather have a natural ear ANY DAY than a bad crop or a bad posting that ruined a great crop. Your D&L puppy comes with an awesome custom cropped ear to match his head's shape and his size when grown. This ear crop is like a piece of art. So please finish the look and let us help you if/when you have any questions or concerns during the posting process. Your puppy's ears take a growth spurt just before their ears are cropped. Most of you will notice this in the weekly photos. Those ears get really long, really fast. Then the ear growth seems to slow down dramatically after 9 weeks of age or so. So during the first few months of life, the cropped ears look really long compared to the size of your puppy. This size will start balancing out as your puppy ages. When your super size dobie puppy reaches about 1 year of age, you are going to start seeing how gorgeous the crop is and how it compliments the superior size of your dobie. Everyone will be in awe of the total package that they see in your dobie. The amateur comments will change from, "those are some long ears", to "that is the most gorgeous dobie I have seen" and "those ears are beautiful". We have heard this over and over and over again.
The D&L ear crop is a medium/long crop with a very clean bell (ear base). Ear crop surgery is performed at 7-8 weeks of age. The stitches are removed 7 days following surgery and just prior to puppy placement. Taping continues until the ears stand which is usually 6 months of age or older. Dogs grow and develop differently so it is impossible to know the exact age that your dobie's ears will be finished. It is VERY important to keep medium/long ears posted until 6 months of age, changing tape weekly. Especially since teething starts at around 5 months of age. The ears can become weak during this time since lots of calcium is going to the development of teeth. So don't get discouraged if you notice the ears appearing to be weak at this point, just keep posting. Posting allows the cartilage to remain in the correct position as the cartilage thickens during the first year of life. Longer crops are heavier and require thicker cartilage to stand. If the ears are allowed to be un-taped until they fall, then the ear cartilage can be weakened and the chances for a perfect outcome are drastically reduced. Please keep them posted until they stand. Send photos anytime and we can help you know when you and your dobie are finished with the process. Please don't let your puppy's surgery and healing be wasted and have your Doberman look less than their potential. Ears that don't stand is just one sign of a Doberman that was not cared for like they deserved. Also, a bad crop takes away from the quality look of your dobie. The photos below are an illustration to assist you in posting your puppy's ears. There are many different ways to post ears and this is the technique we have progressed to over the years. We know these puppies, we know this crop and we know this works. Don't let anyone (not even your vet) tell you differently in regards to your D & L Doberman. Special note: Veterinarians are not taught cropping and care/posting in vet school. This is an acquired art that is not acquired by many vets. Some vets will admit they don't like doing crops/aftercare or they don't do them at all. Please don't hesitate to call (870-974-0095) or email (dandldobermans@gmail.com) anytime with questions regarding your D & L Doberman puppy's ears. We want to help and we want their ears to be gorgeous when you are finished. It will be worth the little bit of time that this takes each week until the ear cartilage is thick and strong enough for the ears to stand perfectly!!
WEEKLY: REMOVE TAPE, WIPE EARS CLEAN, DRY COMPLETELY, and RE-TAPE IN SAME SESSION
ITEMS NEEDED:
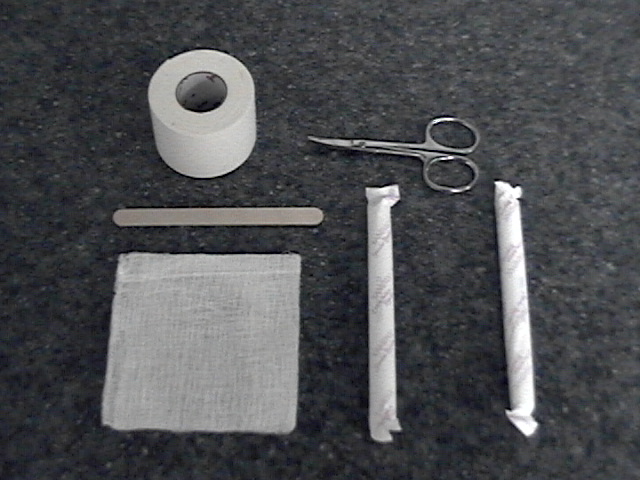
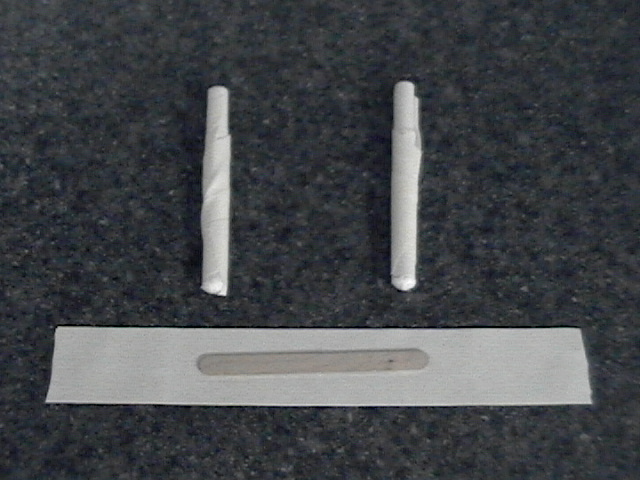
TAMPONS (Equate, regular, cardboard), or poly foam caulk saver 5/8"x20' roll (can be found at Home Depot),
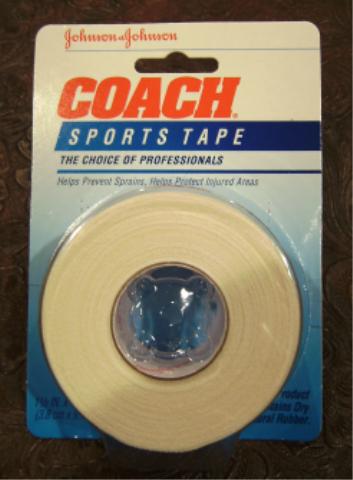
TAPE (Johnson & Johnson Coach sports tape, cloth, 1.5" wide, NEVER NEVER use water-poof tape),
SCISSORS (small, sharp, crooked tip, available in Wal-mart cosmetics department),
GAUZE (4"x4" pieces of gauze for protecting raw edges or raw spots from the tape as needed),
BRACE (4" wooden craft sticks).
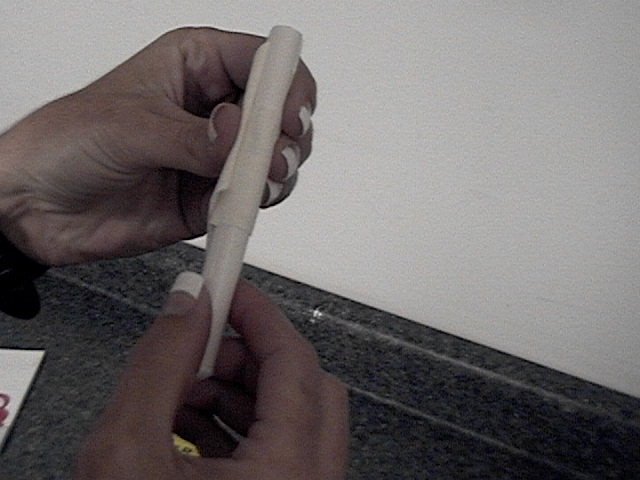
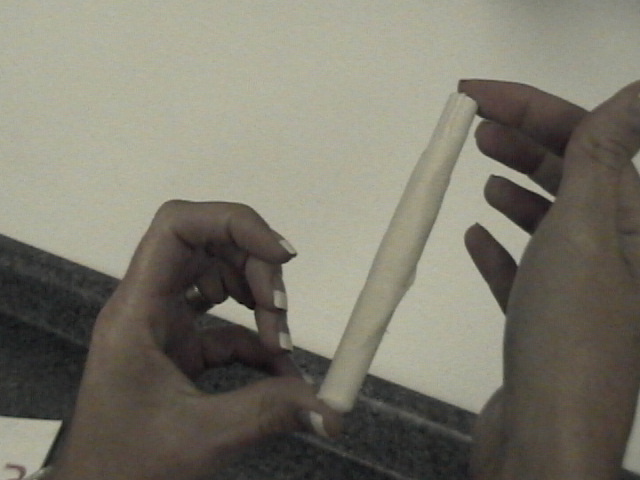
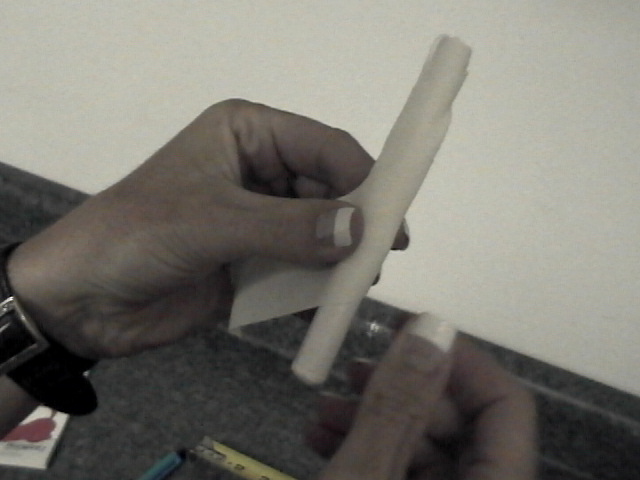
Remove tampons from the paper sleeves. Cut the exposed string off the end. Tape the tampon joint so it will not slide but will remain at the longest length. Measure the tampon in your puppy's ear by pushing the tampon firmly down into the ear canal (approximately 1/2") until the tampon stops. Now look at the top tip of the tampon as compared to the length of your puppy's ear. Is the tampon extending past the ear tip? Probably not. Take note of how much longer the post/tampon needs to be to go past the ear tip. Then remove the post from the ear, and partially slide out the cotton insert at the bottom end of the tampon/post by the amount needed so the post is just a bit longer than the tip of the ear. Then tape the cotton insert the same way you taped the middle of the tampon so the cotton insert does not re-collapse when the tampon is placed firmly in the ear canal.
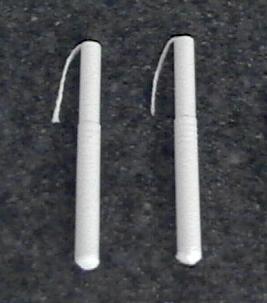
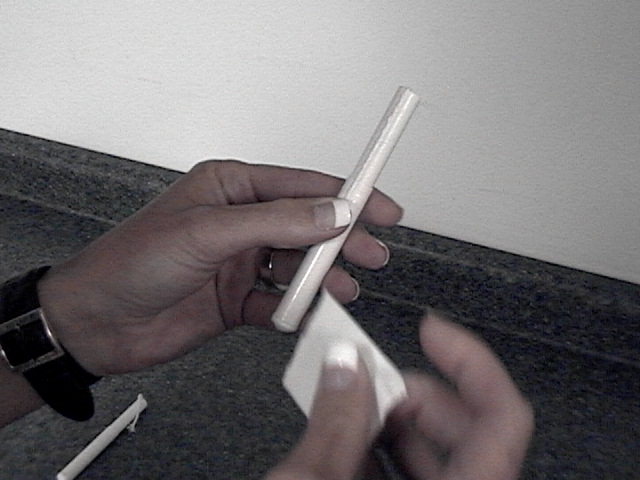
Now that the post is the correct length your ready to make it sticky. Do this with a 8" long piece of tape. Start the tape at a slant (sticky side down) at the top of the post. Then after the tape is started on the post, change directions and reverse tape the tampon. The sticky side should now be facing up. Twist the tape in a spiral motion down the post to the bottom. Now this sticky post is ready to be placed inside the ear.
Tape lengths needed for posting ears are:
1 piece - approximately 12" long for the brace
2 pieces - approximately 3" long for ear tips
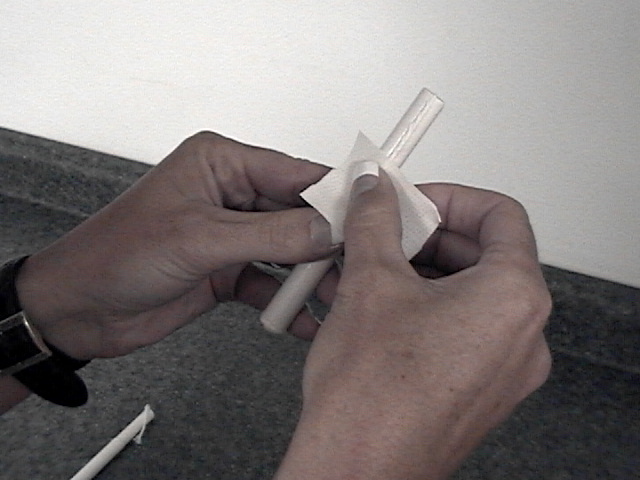
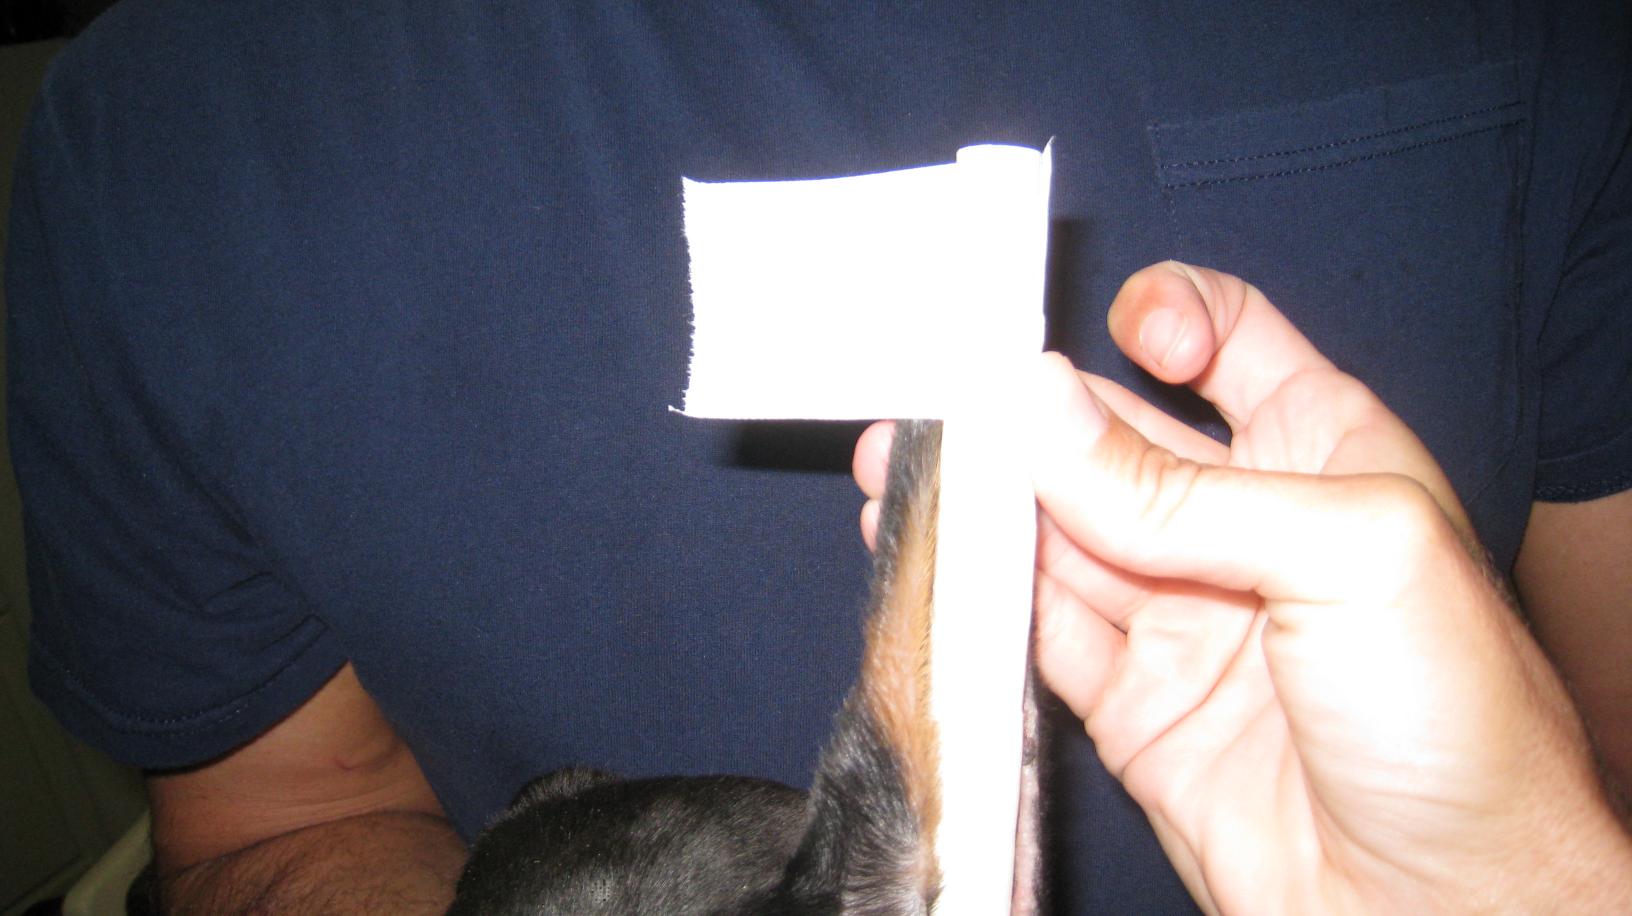
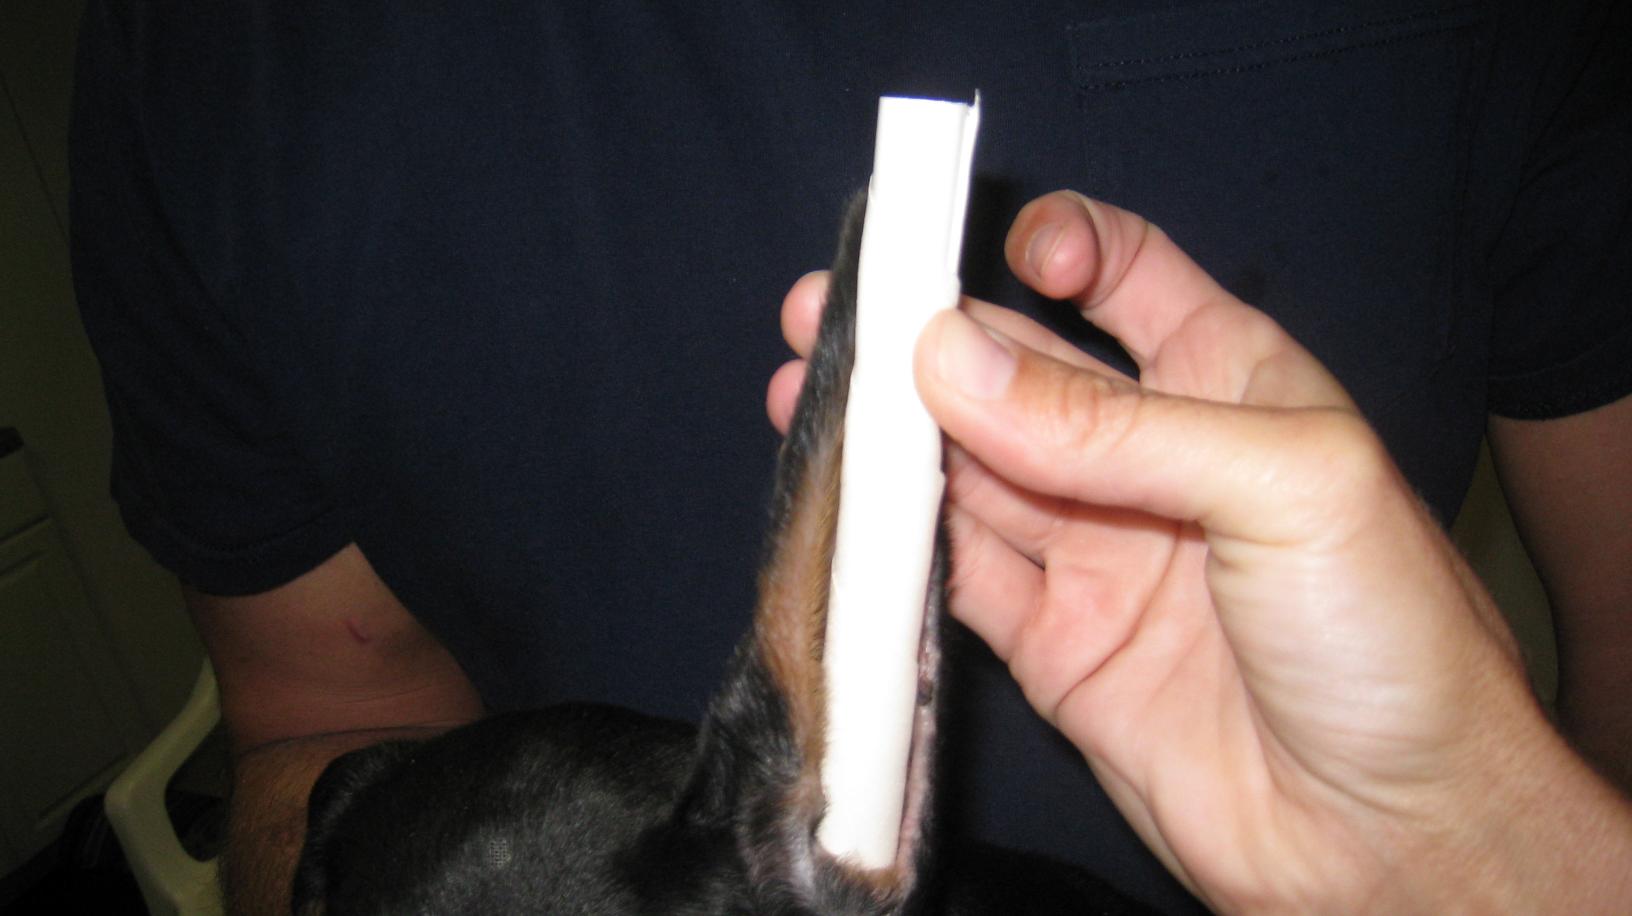
Now for the posting and taping of the ear. You will need a helper to hold the puppy still. Place the sticky tampon into the ear. It will go down about 1/2" or 1" into the ear canal and will stop. So push it into the ear and pull the tip of the ear up to get it firmly into place. The tampon will line up in the ear canal and follow the ear straight up to the tip. MAKE SURE THE TAMPON MEETS OR PASSES THE EAR TIP. If the tampon is not long enough then pull out some of the tampon filling at the bottom end and tape it in place as well to extend the length to fit your puppy's ear. Now back to taping, keep holding the ear tip firmly to the sticky post so it doesn't come off or get slack while you are taping the ear tip to the post. Start the tape on the post, then pull the tape but NOT TOO TIGHT. Tape toward the inside of the head while holding the ear tip at the top of the tampon. You will now notice a fold in the ear. As you pull your tape around the ear, the crease should fold back and lay against the ear. This is a natural fold in the ear that you want to keep. Wrap the ear around completely with your piece of tape. Do this with both ears and then your ready to brace the posted ears.
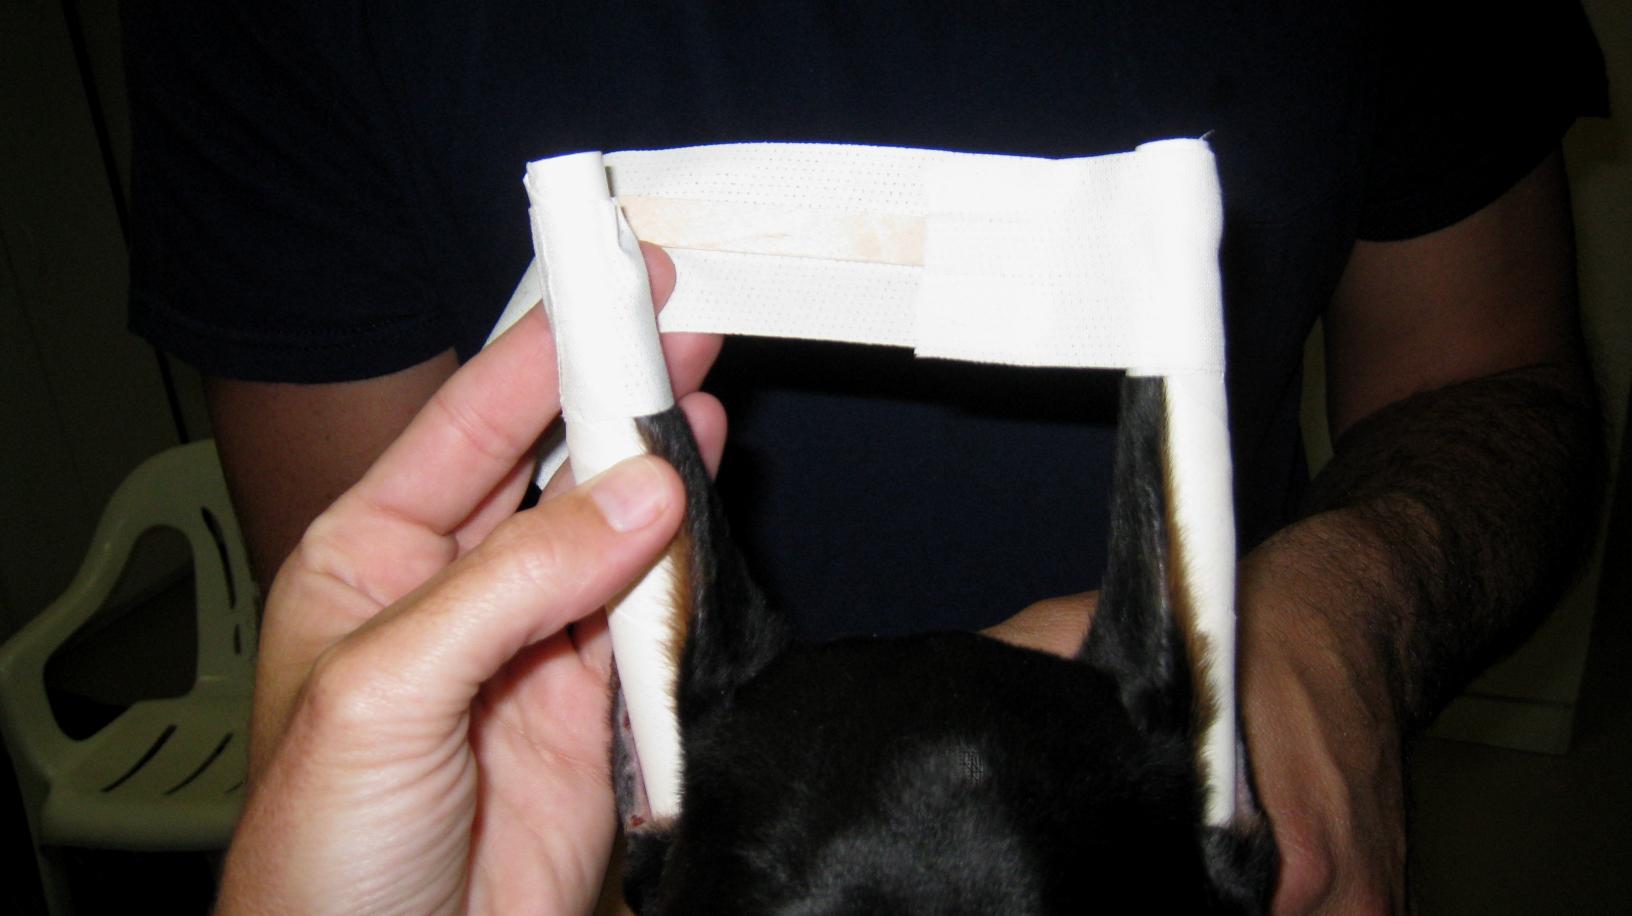
Now for the brace. Place the wooden craft stick on the sticky side of the tape. Place the brace to the back side of the ear and the brace end to middle or inside edge of the ear and wrap the tape ends around each ear and back to itself (covering the brace and sticky tape). The brace should keep the ears at a distance of straight up or tilted slightly out. You do not want to brace the ears at a stance of pointing inward. The brace also helps support the ears so there is not as much movement when the puppy plays.
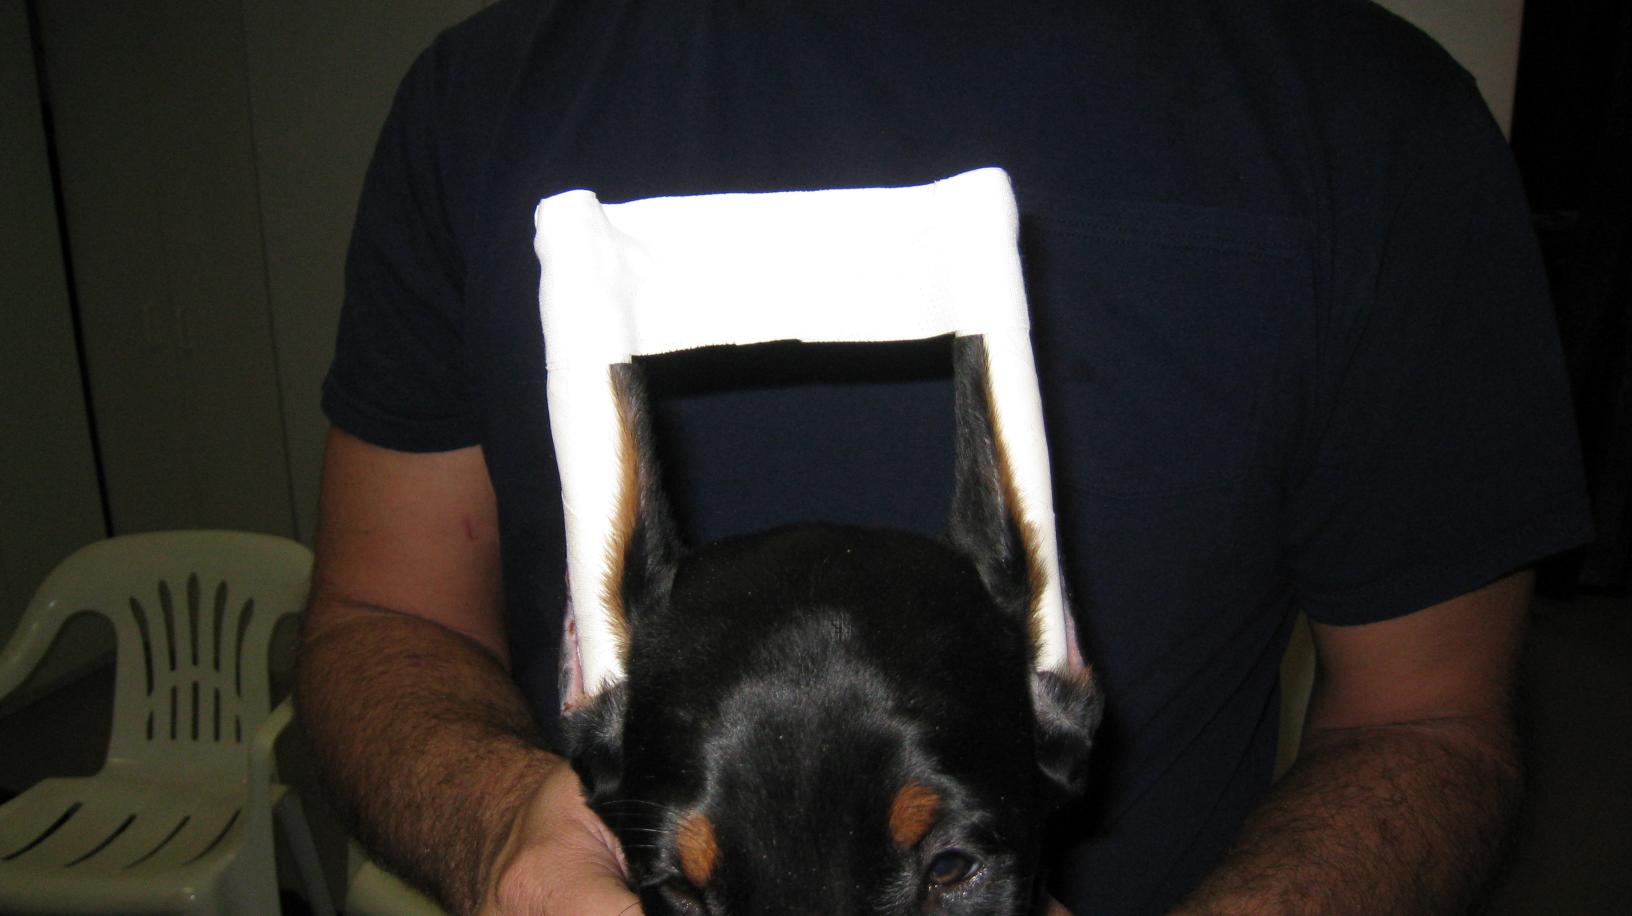
Now your puppy has a new hat for a week or less. NOTE: Re-tape every 2-3 days in the beginning until the ears are totally healed and used to the tape/posts. Keep the ears totally DRY at all times and the puppy cool (not hot and sweaty) . If you smell anything or the puppy scratches at the ears more than just a tiny amount, then you need to remove the tape and check to see if anything is raw/infected under the tape. Each time you tape, the tape could rub differently and cause a blister that can become infected quickly. If a blister or infection occurs, DON'T PANIC, just clean the ear and the ear canal with antiseptice, dry the ear and place a piece of gauze on the area to prevent irritation from the tape and then repost/retape the ears over the gauze. But keep a close watch on the irritated area. The ears need to be posted but the blister and/or infection needs to heal as well. So this might require daily or 3 times per week taping so the raw area can be cleaned until it heals. WHATEVER YOU DO, DON'T LEAVE THE EARS UN-POSTED. Ears will kink and shrink and fall . This will be the first thing some un-experienced vets recommend. DON'T DO IT! Call anytime with questions (870-974-0095). You will do great!! We still get blisters under our tapings occasionally as well. Many beginners are experts at posting within a few taping sessions with their new puppy!!! Taping is also a great exercise for your puppy by teaching patience and trust.
Now that you have taped your puppy weekly and he/she is 6 months of age, how do you know if the ears are finished?? Unfortunately, you can't use a toothpick to see if your puppy's ears are done, like you can when baking a cake. :) So here are the details on testing the puppy's ears to see if they you are at the end of your last roll of tape! First of all, when you remove the tape/posts, the ears should be standing perfectly and both ears should look exactly the same. If not, the puppy is not finished, so continue with weekly taping. If they look perfect and your puppy is 6 months of age or older, then leave the tape and posts off and allow your puppy to play while he/she is supervised by you. An hour may go by, maybe 5 hours, maybe 12 hours and they are BOTH still standing perfectly. Great! Now, 3 days may go by and you may notice that one ear tip might start curling or looking weak or the middle of the ear might look weak or the ear might start tilting or drooping. Immediately, and we mean immediately, get those ears back up!! This is the most critical stage in the process. If that ear is allowed to break over, the ear's cartilage can be permanently damaged. Just to be safe, I would do this on a weekend or sometime that you can watch the ears closely. If you have any doubts (CALL US), just repost and try again next week. D & L's Outlaw Josie actually went 2 full weeks before one ear started looking weak. We re-taped and the next week she was finished and they were perfect from that point forward.
Good luck! We hope the above information and photos are helpful. Please, please call (or text message) or email us if you have any doubts or concerns about your D & L Doberman's ears!! (870-974-0095 or dandldobermans@gmail.com). Thank you for taking such great care of your puppy and we will talk to you soon!
Please contact your breeder and your veterinarian with questions about your (non D&L) doberman's ears. They know their dobies and ear crops best. We do not want or expect other vets or breeders to answer questions about our dobies and ear crops and expect the same from others as well. If you do not expect support from your breeder on their puppies or ear crops then PLEASE DO NOT CROP THE EARS or please do not adopt a puppy from these sources. Vets that do ear crops on a routine basis are difficult to find. Please do not crop your puppy's ears if you have doubts about the veterinarian's experience or support. Dobermans are beautiful with natural ears as well. Do not expect a beautiful crop without lots of support, work and commitment. If your dobie acquires a bad ear crop or a fallen ear or tip then the blame is on the owner for not being committed and doing their research. Many veterinarians have stopped doing ear crop surgery due to this lack of commitment by pet parents. This is not a simple procedure that is done and over with surgery. Educate yourself and know that you have support or do not put your pet through an ear crop and ruin their ears. Thank you.